Friday, February 12, 2021

Oh how I’d love to be fishing!


This is for all the fisherman in your life.


I’m certain each of you can put this card together in your sleep but here are some more pictures:


And now for something completely different


I just realized I put the f upside down!  Too late to change it!


This is actually 4 small boxes around a tall box.  I’ll post more pictures here but since this is too difficult to explain, I’ll demonstrate how to put it together when you pick up the kits.


And now for a female get well card

Guess what!  You need to color the chair!  I know some of you are happy and others are groaning.  Can’t make everyone happy!  But you’ll thank me for this card when you see the next one.

This is a simple card so I’m not going to go into much in the way of instructions.  The only things I popped up were the flowers on the left side of the card.

And this is the inside:


Let’s sail away


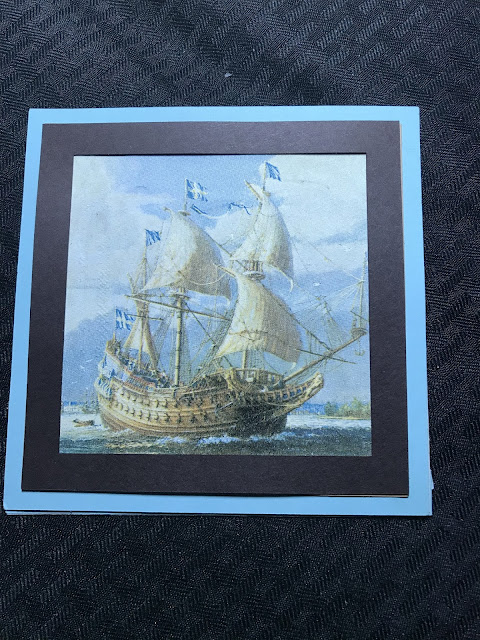
 Isn’t this image beautiful?  Judy Huetz visited this ship a couple of years ago and brought these napkins back and thought I could do something with them.

It is such a serene image with a male flair, I decided to make a male sympathy card.  Thank you Judy!  I hope you enjoy making the card.

It’s very simple but there are a few points for you to know:

1). There is a white square piece of cardstock that you will attach to the napkin.  I used a glue stick and then took a brayer to attach the napkin firmly.  BUT FIRST ... remove the 2 layers of the napkin leaving just the patterned piece to work with.  I was going to do that for you but I ran out of time.  

2). This is an easel card   So take the white card in your kit and fold the top section in half.  The first layer you’ll adhere to the folded section is the blue cardstock but only put adhesive on the fold of the card and then attach the blue piece to it. 

3.  Then center the white piece to the blue piece, apply your glue stick to that white piece and carefully lay your single layer napkin on top of the white piece.

4). Now adhere the brown frame on top of the napkin..I decided to do it this in this way because the frame will hold the napkin in place securely.  

5.  Adhere the second square blue piece on the inside of the card, put the small brown piece in the center of the inside, then pop up the sentiment.  Attach the waves and you are finished.

Friday, February 5, 2021

Poppy flowers


There are 2 layers to the large poppy and 3 layers to the small poppy.


I decided that the ink I used for both the front of the card and for the inside sentiment was too light so I redid them in black.  Some of you might have pieces with the original color ink still in your kit.  You can just throw those away and use the ones in black ink.

Lots more layers


I think I went way overboard with layers on this card but I hope you like it.  It really doesn’t need much in the way of explanation.  Here’s a side view.


Everything is popped up except the bottom layer.

And now for something different

 Remember that I said in the description of the card in a box that if a card is difficult, I would tell you.  Well, this card is difficult!  But it’s not impossible.


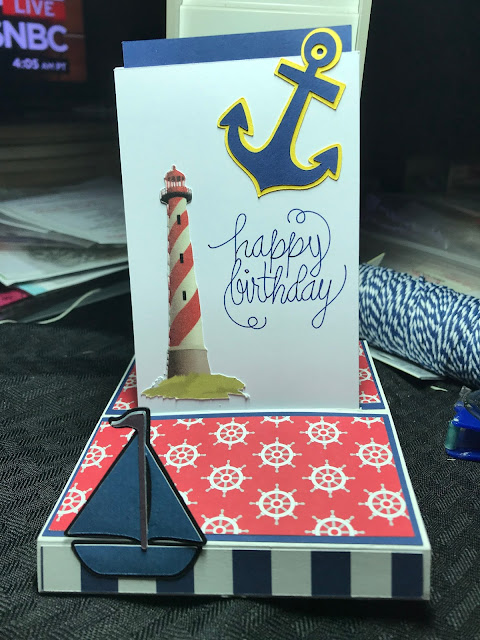
This is called a free standing card.    Shown above is the front and this is the back.

If you’ve never made one of these, you’re probably wondering how on earth you are going to mail it.  Basically, the box portion of the base slides up over the standing portion of the card so that it folds flat.


This is the card partially flattened.


And this is the card completely flattened.  And this is how it’s made.


First, take the large blue piece, plus the front and back sentiments.


Sandwich the blue piece between the two white pieces LINING UP THE BOTTOM.  That way you will be able to pull on the blue tab on the top to open the card.

Next, take the long white piece (I folded it in half so that it would fit in the baggie.). Fold it on the score lines so that you end up with a piece that looks like this:


Use your bone folder to crease well on each of the score lines.

Now, and this is where the tough part comes in if you haven’t made this type of card before, put a strong adhesive on the 2 narrow tabs of the large white piece but don’t stick them together yet.  Take the sentiment stand up panel and slide it through the slit and then attach it to one of the narrow tabs as shown in the picture below.


Then bring the other narrow flap over to meet the first one and secure it well.


Once the two narrow tabs are securely attached, decorate the base as shown.


The bottom is decorated with the blue anchor paper.   But now that everything is packed up, I realized I forgot to take a picture of the bottom.  But I know you’ll all figure it out!

Bye ‘til next week.


Monday, February 1, 2021

Are you ready for some football??


I figured with the Super Bowl on Sunday, it was time for a football card in a box.  I know I often say a card is simple to make, but this one truly is.  If it was difficult, I would tell you so.


It really is quite simple but I’ll show you a series of pictures just so you know how to put the pieces together.


There are 3 pieces to the helmet.  Assemble them as shown above.


There are 2 pieces to the football.  The one on the left above is actually brown.  I have no idea why it shows white in the photo above.


And this is both sides of the the back of the box.  Enjoy the game ... or at least the commercials.