Friday, November 13, 2020

Victorian Christmas


Another simple card.  This was actually my Christmas card last year but I forgot to mail them.  Old age I guess.


These are the layers to this card.  Tap on the picture to see all the layers and the order in which they are assembled.  For some reason, Blogspot loves to cut off my pictures.


Each of the layers is popped up, except the bottom layer.  The sentiment is also popped up.


And finally, this is the inside of the card:


Merry Christmas from the stars of Disney


  Don’t panic!  You don’t have to color this.  I think it is a fun card to send to a grandchild or great grandchild.The image of the Disney characters is popped up on the white mat.  And the yellow stars are offset from the  red stars.  Add the inside sentiment and Mickey’s ears and you are finished!


 This one was hard to photograph because of the gold card stock.  And you’ve probably figured out that this is another simple one.  It appears I spent too much time last week watching election returns so I picked the simplest cards to spend time putting the kits together.


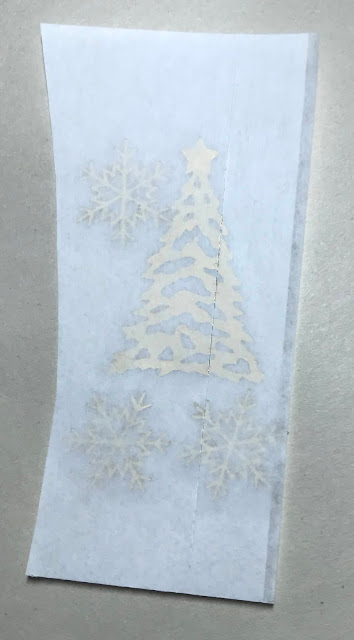
It’s pretty obvious how the card goes together except you’re probably wondering what this is:


  This is what the sheet looks like when you peel off the top layer.  

Peel off the tree and 3 snowflakes but be careful.  They have sticky adhesive on the back of each of them.   Gently place them on the card.

And though this was very hard to photograph, the inside says Merry Christmas.


And how about a card in a box?


 This card has a ton of pictures and pieces so it more difficult than the others.  But don’t worry, you’ll get it done.
There are 2 inserts to this card.  The front insert consists of these pieces:


That’s the front layer and the second layer consists of these pieces for the house.:


There is a gold “door knob” in your kit.

These are the pieces that make up the box:


And once again, the finished card showing the front sentiment and the side panels and flaps.


Have fun making this!

Thursday, November 5, 2020

A different type of gift card holder


This is the front of the card.


And the back of the card


And the inside of the card.

The flap on the left side lifts up to display the sentiment:


You can click on any of these pictures to enlarge the image (I hope!)

The toughest area to pay particular attention to is the gift card holder itself.  Be careful where you put your adhesive.  You need to be able to  slide the card in and out.  So put your adhesive on either side of the opening and at the far right side where the bottom of the card slides in.  Plus, and I forgot to take a picture of this, but when you take the gift card out, there is a strip of red card stock which fits behind the opening.

It’s confusing so yell if you need help.


A Thanksgiving card


This is a simple card.  The only things to remember are:


1). The pumpkins are popped up on the white mat,

2). The white mat is over to the right on the black mat, and

3)  Blessings is also popped up.


This is the inside of the card.


Another Thanksgiving card, this one is an easel card


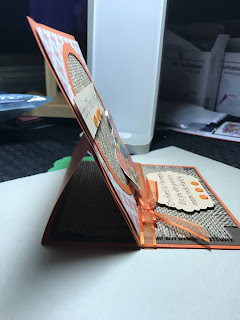
This easel card is very easy to put together.  Here’s a side view in case you don’t remember how to display it.


And here’s how you fold it.  


Once folded, you can set this piece aside for the time being.

Take the square orange piece  and attach the burlap piece.    Then the patterned piece, then the orange circle.  The banner with the sentiment on it is popped up.


Now take the orange square with all the pieces attached to it.  On the back on the orange square, apply adhesive or glue to the BOTTOM SECTION ONLY.  Attach the square to the folded over section of the base which you previously set aside.


On the flat portion of the card base, attach the brown card stock.  Take the second piece of burlap and fringe the ends on the sides and the front then attach it to the brown piece.  Wrap the ribbon around the base and put the seam near the left side of the card base.    Attach the bow.


Pop up the cornucopia on the right side of the orange circle.


Attach the sequins and you are finished!

A Card For Your Grandchildren (or for yourself)!

 Trust me ... this looks harder than it is.


There are quite a few pieces to this rocking house so let’s step through them one at a time.


This is the back of the card.

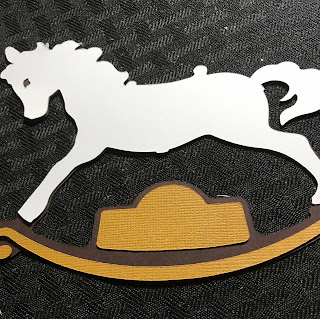
It consists of the black snowflake horse with the white oval.  Make sure the head of the horse is pointing to your right.  You can put aside the white oval for the time being and attach it after the card is completely assembled.  Use it to write a personal message or just sign it here.


The brown piece is then attached to the black snowflake piece, again with the horse’s facing to the right.  Be careful selecting the correct brown piece; you want this one at this point.


Attach the brown piece behind the black piece.


Now turn the assembled piece over so that the brown piece is on top and the horse’s head is facing left.  Then take the two presents, the ball, and the Christmas tree and attach them to the brown piece, along with the two poinsettias.  Assemble as shown in this picture:

Now you have the backside of the card finished so let’s start on the front.  Put your complete backside to the side for now (well, not your backside but the horse’s backside.). We’ll deal with this in a bit.


Take the remaining brown piece and attach the white horse to it.  This time, make sure your horse is facing to the left.

Attach the white horse to the brown horse. 


Attach the 2 light brown pieces to the brown horse as shown above.  Then, attach the stamped sentiment as shown below.


Next, attach the two sections of the saddle:


Attach the tail to the horse.


Attach the red whatcamacallit to the horse.  As an aside, I was thrown off a horse when I was much younger and have never gone near one since so I don’t know what the red piece is called.


Now attach his mane.


Now assemble and attach the green poinsettia near his tale.


Now the front is finished.  Easy peasy, right?

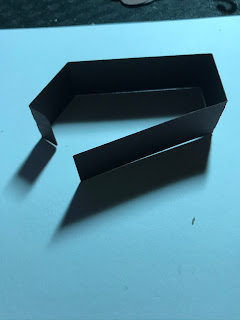
Now you should be left with just a long strip of brown which you need to fold in to itself so you have two long sides, a short side, and a short side with a tab on the end.


Attach the tab to the free long end so you end up with a rectangle.


This is the piece that attaches the front of the horse to the back of the horse.  Put glue on one long end of this insert and attach it to the front of the horse.  Then put glue on the other long side of the insert and attach it to the back of the horse.  This is what it looks like looking down on it.


And you are finished!!! Except don’t forget the white oval on the back of the horse.  Now that wasn’t so hard, was it?  And it really rocks!!