After you’ve assembled these, add the three gems on each of the bottom corners and you are finished! See, I told you it was simple! Inside it says Happy Valentines Day.
After you’ve assembled these, add the three gems on each of the bottom corners and you are finished! See, I told you it was simple! Inside it says Happy Valentines Day.

This is the second in a series of 3 “lady with hat” files I purchased and then modified. Just follow along with the pictures below.


Have fun!


The green leaves and stems only fit one way so dry fit them before you glue them down.


Have fun making this one.
When you pick up your kits today, we’re going to fold this card because it can be a little daunting.

This is how to decorate it.
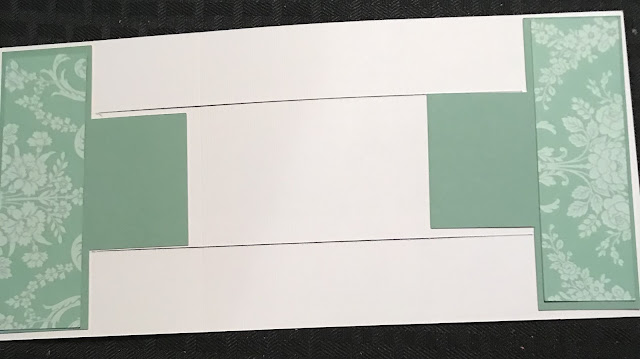


This shows the folds.


Now fold it and your card is finished.

Attach the white embossed piece to the left side of the black piece, leaving a black border around it. Attach the black piece to the white card base, matching the loops. Don’t bother putting glue on the loops.
Attach the front sentiment as well as the inside sentiment and your card is complete.

I forgot to use the picture which shows the pink pearls across the top border. Anyway, I sent this picture to my sister and her opinion was “that’s weird “ but I like it and hope you do too.
You have 2 large patterned pieces but one is larger than the other. Use the solid side of the large one to attach to the card base. Then attach the patterned piece on top of the solid piece. Leave a border around the entire patterned piece.
Attach the patterned butterfly to the solid butterfly, putting glue just on the outside edges. Leave the inside butterfly loose so you can lift up the wings.
Attach the frame to the sentiment and secure it on the card.
All done!


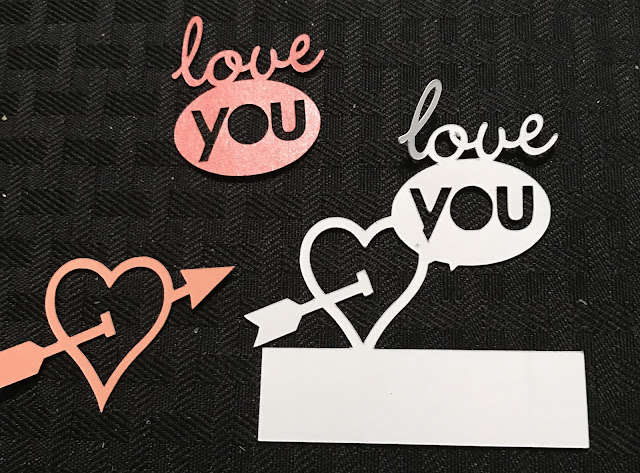


Now that you have all the segments assembled, fold your box in the normal way and then put the inserts into the box. The segment with the heart at the top with the arrow through it goes in the back. The segment in front of the back segment says Love You, and the front segment is the Cupid. It doesn’t matter if you put the separate Cupid in the front or the back of the Cupid insert. It is there just to add stability.